Building a Reliable Campfire in Wet or Damp Wood

Imagine you've spent six hours hiking through a persistent drizzle, and the dampness has finally settled into your bones. You reach your campsite, your hands are cold, and your primary goal is a way to dry your socks and warm your spirit. You grab a handful of sticks from the ground, but after ten minutes of poking at a tiny, sputtering flame, nothing happens. The wood is sodden, the air is heavy with moisture, and the heat seems to vanish as fast as it's produced. This isn't a failure of skill; it's a fundamental mismatch between your fuel and your environment. To build a fire when the moisture levels are high, you have to change how you look at the forest floor.
Standard fire-starting methods often rely on deadwood found on the ground. However, in wet conditions, that wood is often a sponge. If you want a fire that actually holds heat, you can't just rely on what's lying under a bush. You need to look up, look inside, and look for the parts of the wood that the rain couldn't reach. This process requires a shift from being a passive collector to an active harvester of dry material.
Where do you find dry wood in the rain?
When the ground is soaked, the most reliable dry material lives above the waterline or inside the wood itself. If you're in a forested area, look for standing deadwood—trees that have died but haven't fallen over yet. The bark on these standing trees often protects the dry core. You can also look for the underside of large, fallen logs; the wood directly touching the earth will be a mess, but the side facing the sky or protected by a heavy canopy might be usable.
Another trick is to look for "fatwood." This is a resin-rich wood often found in the stump or base of old pine trees. Because of the high resin content, it resists moisture and burns with an intense, hot flame even in damp environments. You can find it by looking for cracks in old pine stumps or by checking the base of dead trees. It's a natural candle that works wonders when everything else is a soggy mess. For more detailed information on wood types and their properties, you can check out the U.S. Forest Service resources on forest ecosystems.
How can you prepare wood for burning?
You can't just throw a thick, wet branch onto a small flame and expect results. You have to process the wood to reach the dry center. This involves a few specific steps:
- Feather Sticks: Use a small knife to shave thin, curly strips from the center of a stick. These curls stay attached to the stick, providing more surface area for the flame to catch while keeping the core intact.
- Splitting: If you have a small hatchet or even a sturdy knife, split your wood. The exterior is wet, but the interior is often quite dry. Splitting wood exposes the dry inner fibers that are ready to burn.
- Creating Tinder: Don't rely on store-bought cotton balls alone. If you're in the wild, look for dried inner bark or even the fine, dead needles from a coniferous tree.
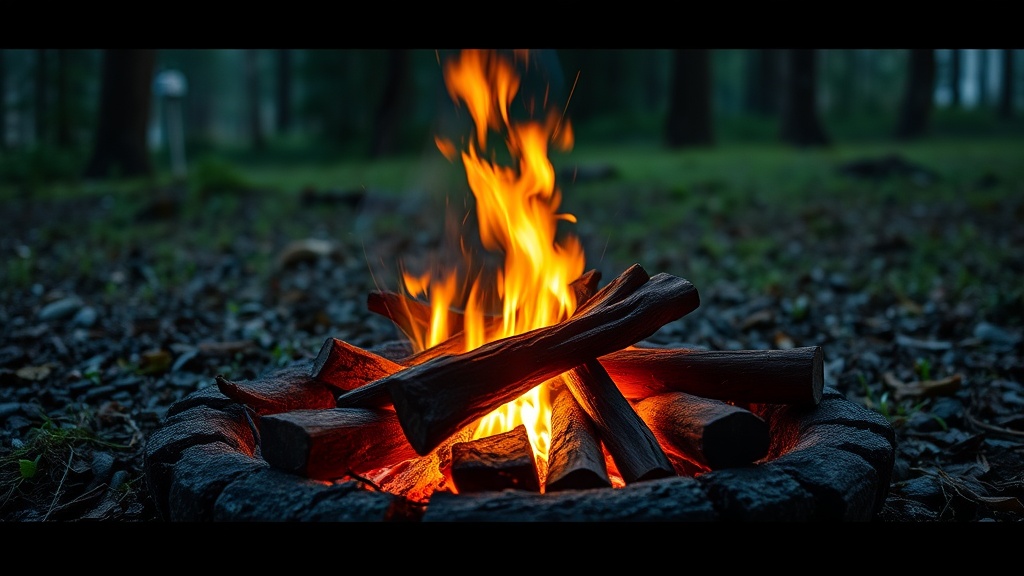
Once you have your material, the way you arrange it matters. In wet weather, a "teepee" structure is often better than a "log cabin" style. A teepee allows more airflow around the base, which is vital when the wood is struggling to stay lit. You want to create a chimney effect where the heat rises through the center of your fuel.
What is the best way to start the flame?
In dry weather, a simple match or lighter might be enough. In the damp, you need a high-heat, long-lasting ignition source. If you're a regular outdoorsman, carrying a small tin of waterproof matches or a ferrocerium rod is a smart move. However, the real secret is the "pre-heat" stage.
Before you try to build a large fire, focus on a tiny, concentrated heat source. Use your smallest, driest shavings first. Once that tiny flame is stable, slowly add slightly larger pieces. If you add big, heavy sticks too early, you'll actually snuff out your small flame by stealing the heat and introducing too much moisture into the air.
It helps to keep a small "heat bank" going. This means keeping a few small, glowing coals underneath your main pile of wood. This prevents the fire from dying out if a sudden gust of wind or a fresh drop of rain hits the embers. If you're interested in the physics of combustion and how it relates to environmental factors, the Britannica entry on combustion provides a deep look at the chemical reactions involved.
The key is patience. A damp fire is a slow climb, not a sudden explosion. You are essentially building a heat engine that slowly dries the fuel as it burns. If you rush the process, you'll end up with a pile of smoking, charred sticks and a lot of frustration. Take your time, keep your fuel sorted by size, and always keep your fire pit slightly improved if possible to avoid the soaking ground.
One final tip: always keep your kindling and your finished "fuel" in two different piles. This prevents your dry, ready-to-burn sticks from getting wet while you're working on the initial flame. A organized workspace is the difference between a cold night and a warm one.